First things first, let's talk webhooks. They are one of the various means to facilitate communication between online services - a way for apps to connect with one another. More specifically, a webhook is an HTTP request, activated by an event from the origin system, to the target or recipient system.
This automatic data exchange occurs over the web, using the HTTP(s) protocol, and in most cases, the actual data is sent using the JSON format within the HTTP request body. When configuring a webhook, the sending app becomes acquainted with the webhook target URL that the recipient app is listening to, and awaits events.
Using SFTP To Go’s webhook notifications, you have the ability to Integrate your apps and keep up with the deletion, creation, or modification of files and directories in your SFTP and process them automatically as the change takes place.
This post provides a step-by-step guide to show you how to set up webhook notifications in SFTP To Go. For testing purposes, we will use a webhook.site endpoint as the webhook URL. As soon as you’re in place with your own app code, you should set the webhook URL to your app’s URL and assure that you’re handling the requests properly.
You may also want to watch our short webhooks tutorial:
Step 1: Add a new webhook
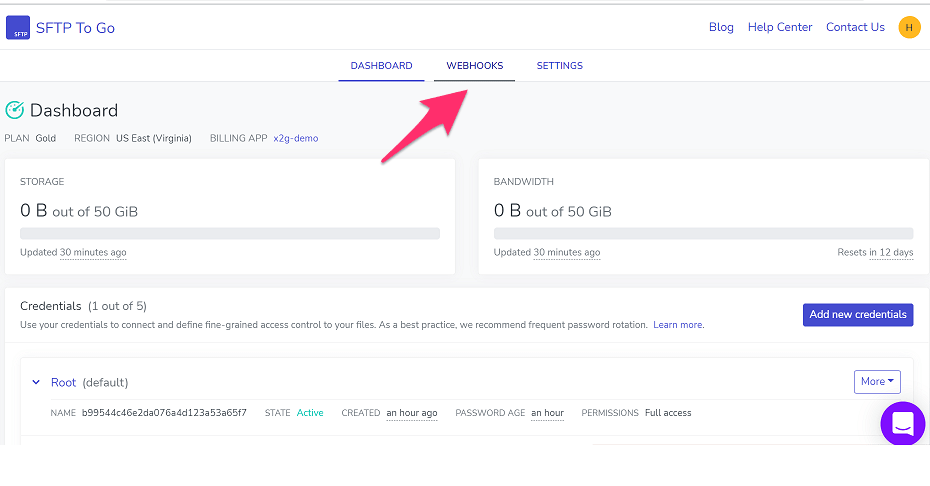
- Go to your SFTP To Go dashboard.
- Click Webhooks in the top menu.
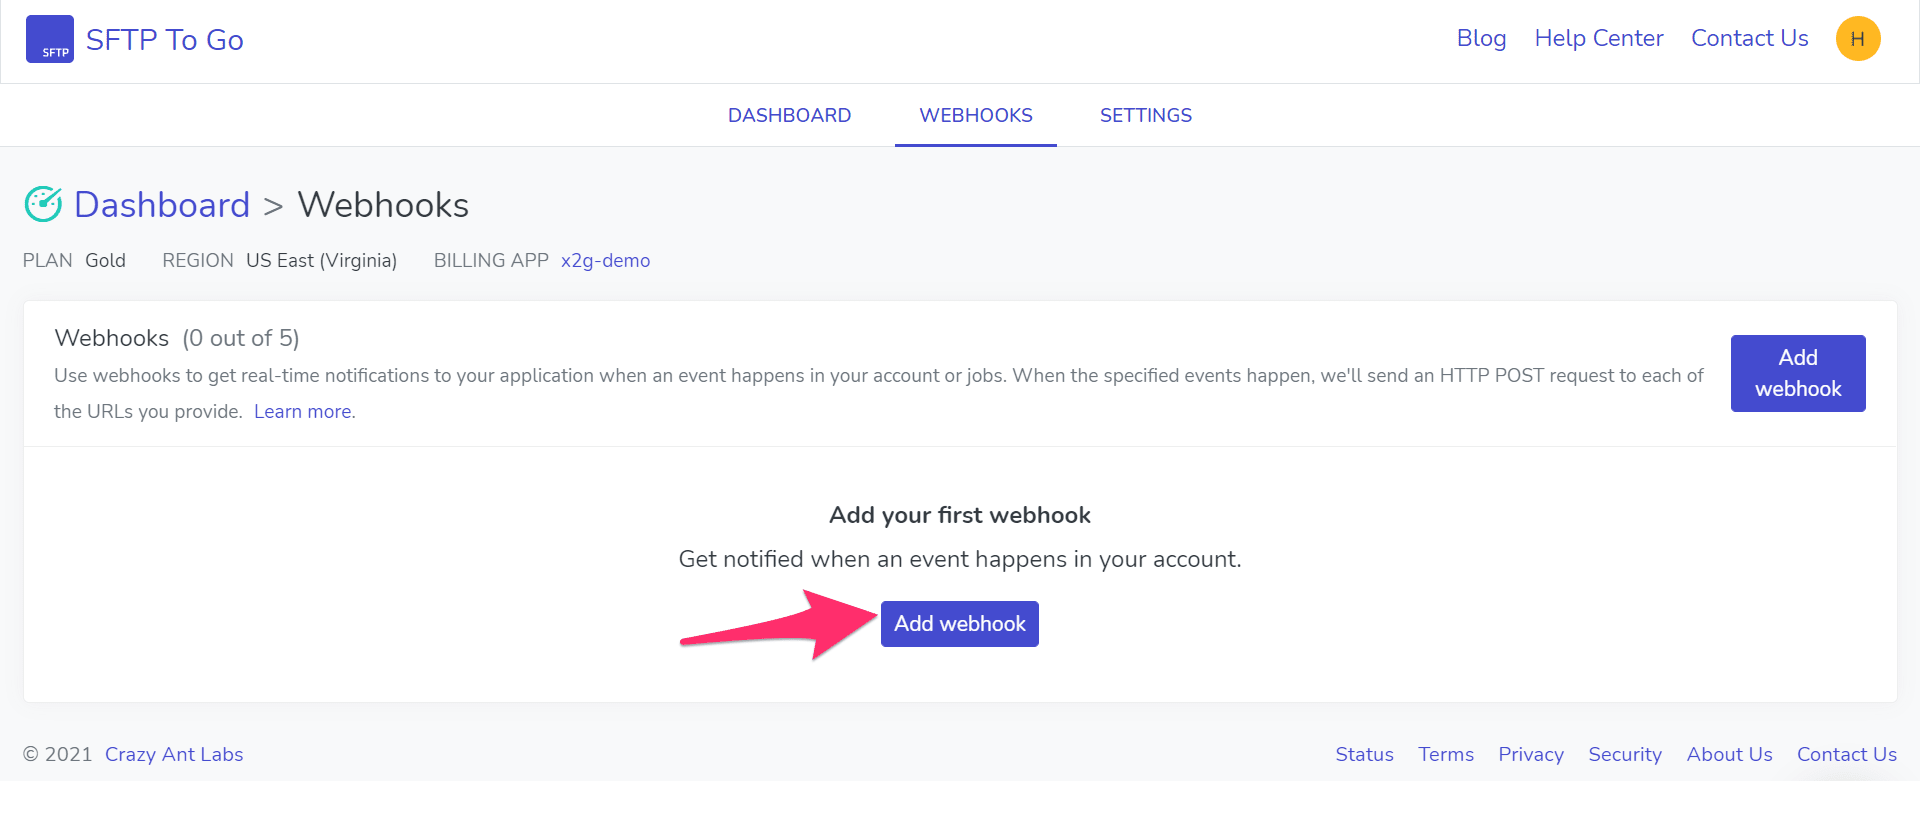
- Click Add webhook
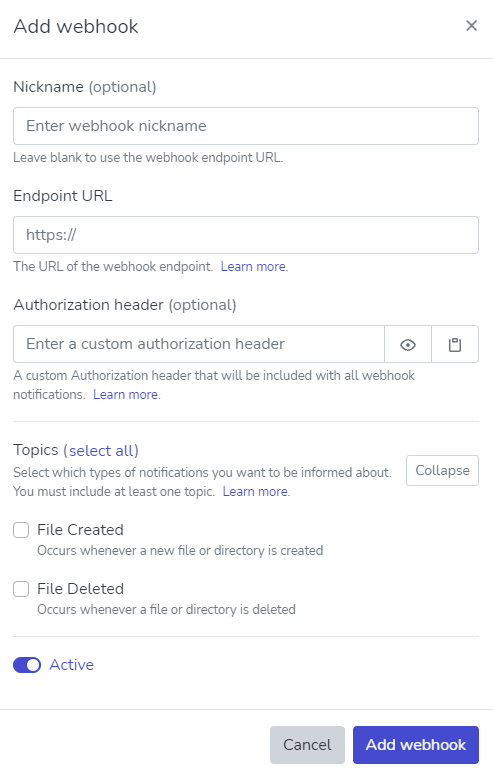
- In the dialog that pops up, fill out the following:
- Nickname - an explanatory and easily recognizable name for your webhook.
- Endpoint URL - HTTPS URL of your server endpoint that will be receiving all of the webhook notifications.
- Authorization header - In the case that your app requires authorization or if you want to ensure that the requests you are receiving are indeed from SFTP To Go you may fill in a value in the Authorization header and simply check that it exists on the receiving end.
- Topics - pick the kinds of notifications you wish to be alerted about. Depending on your use case, you may want to choose one or both of the topics:
- File created - Notifies you whenever a new file or directory is created.
- File deleted - Notifies you whenever a file or directory is deleted.
- File downloaded - Notifies you whenever a file is downloaded.
- Click add webhook.
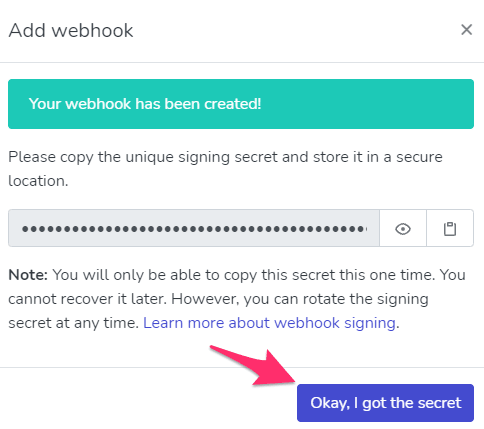
- A signing secret is created and revealed once for you to copy. Each request is signed by SFTP To Go in the webhook request’s
X-Hub-Signatureheader. If you wish to confirm the authenticity of our request, copy the signing secret and use it to verify the webhook signature. You can rotate the signing secret at any time to be assigned a new one. - Click Okay, I got the secret and continue to the next step.
Step 2: Test your new webhook
Your webhook is all set up and now it's time to test it to make sure that everything is working adequately on the receiving end as well. The most efficient way to do so would be to send a ping webhook:
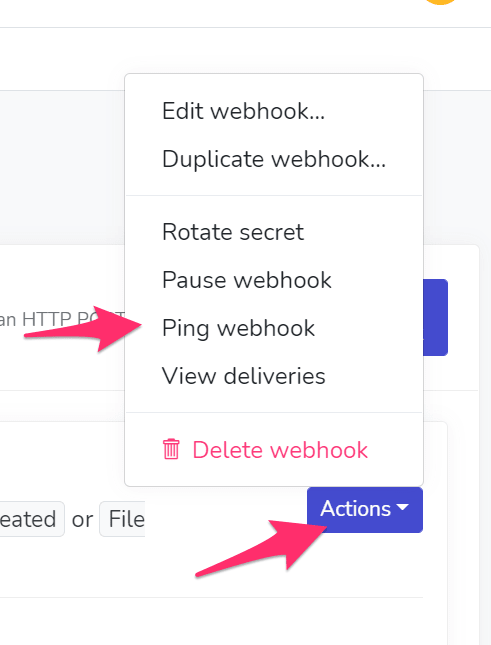
- In the webhooks panel in SFTP To Go, Click your webhook’s Actions menu and choose Ping Webhook.
- Click Yes, ping this webhook.
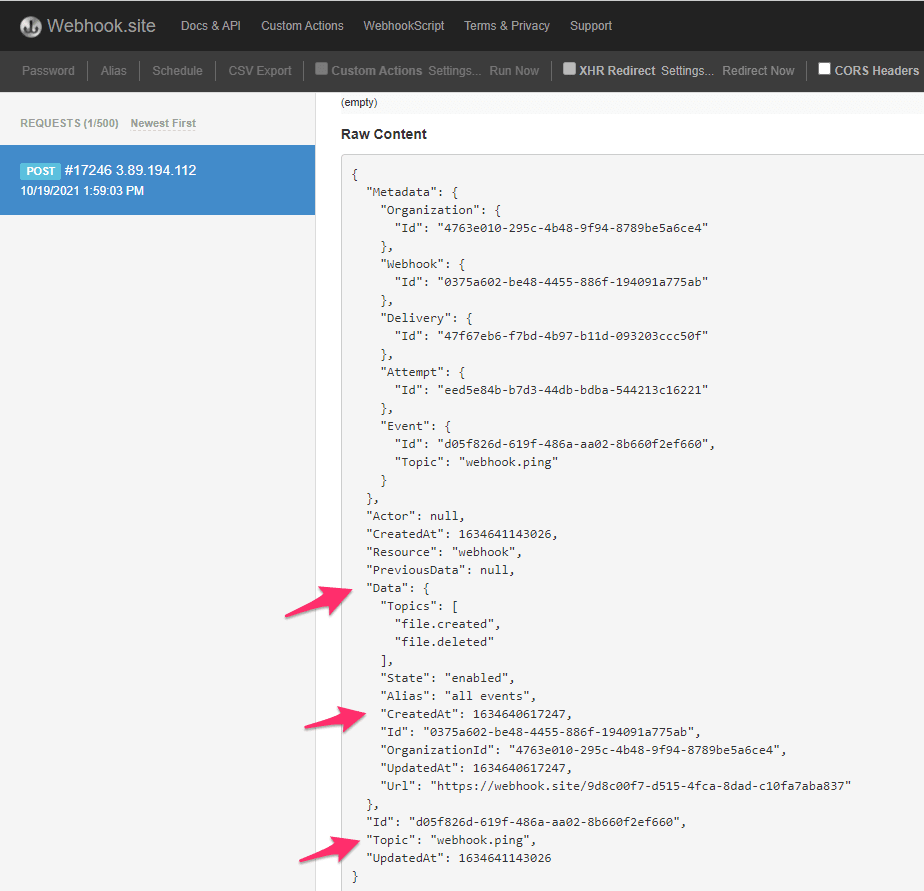
- Verify that your app obtained and managed the webhook. Bear in mind that it should respond with a 200-level status code. If you’re using webhook.site to test out the webhooks, you can view the request headers and body. Within the payload, note the
CreatedAtkey, that tells you when the event occurred, and theTopicwhich tells you that it’s a “webhook.ping” event. TheOrganizationIdidentifies your SFTP To Go add-on instance.
Another option available to test the webhook is to wait for an event to occur or start an event manually by simply uploading a file or deleting an existing file.
The Data key in the request payload contains important information such as the file path and size.
For more information about webhook payloads, read here. Learn about automating SFTP to reduce human error and streamline workflows.
Post photo by Damir Spanic on Unsplash

