In our ongoing series on syncing local Mac folders with SFTP To Go, we’ve explored a range of nifty FTP sync tools for Mac, file managers, and FTP clients, including FreeFileSync, GoodSync, Transmit 5, and Forklift.
FreeFileSync offers an open-source manual option with somewhat convoluted automation options, while GoodSync excels in automation all on its own. Transmit 5 is great for quick manual FTP syncs (and SFTP Syncs), and Forklift brings user-friendly two-way sync features, albeit also manual.
This post is all about ChronoSync, known for its automation features, flexible scheduling, real-time SFTP or FTP sync, and advanced file archiving and restore features.
We’ll walk you through the setup and show you why ChronoSync is such a popular choice for sensitive file management and customizable SFTP and FTP synchronization between your local Mac and SFTP To Go.
We like it.
More about ChronoSync
ChronoSync is a versatile sync and backup tool designed for macOS. Whether you need to sync files between local directories, external drives, or remote SFTP or FTP servers, ChronoSync offers a comprehensive set of features that make it an excellent choice for all sorts of applications—but especially sensitive file management.
ChronoSync brings a huge array of impressive granular settings, including options for handling deleted files, archiving, selected file sync, and restore operations. Its built-in scheduling and automation capabilities ensure that your sync tasks run smoothly and efficiently, minimizing manual intervention.
It’s impressive archiving and granular sync management features make it a popular choice amongst designers, digital creatives, and software developers.
Watch this video intro to learn more:
Chronosync features and benefits for SFTP and FTP Sync
- Multiple sync types: Backup, bidirectional sync, mirror, bootable backup, and more.
- User-friendly interface: Easy setup with visual progress indicators.
- Scheduling and automation: Schedule tasks and set custom triggers.
- File comparison and analysis: Advanced comparison and Trial Sync to preview changes.
- Versioning and archiving: Archive replaced files, and restore files as needed.
- Customizable options: Handle errors, conflicts, and special files.
- Security and encryption: Secure FTP and SFTP support with data encryption.
- Performance optimization: Multi-threaded operations and SmartScan.
- Cross-platform compatibility: Syncs with various systems and devices.
- Notifications and alerts: Real-time task status alerts.
- Scriptable and extendable: Automation with AppleScript.
- Detailed logging and reports: Comprehensive task logs and reports.
- Granular sync and restore: select individual files and groups of files for custom sync operations.
Ready to set up and use ChronoSync for syncing your local Mac with an SFTP To Go server?
Let's go!!!
How to install, set up, and run ChronoSync for Mac to SFTP sync operations
Download and install ChronoSync
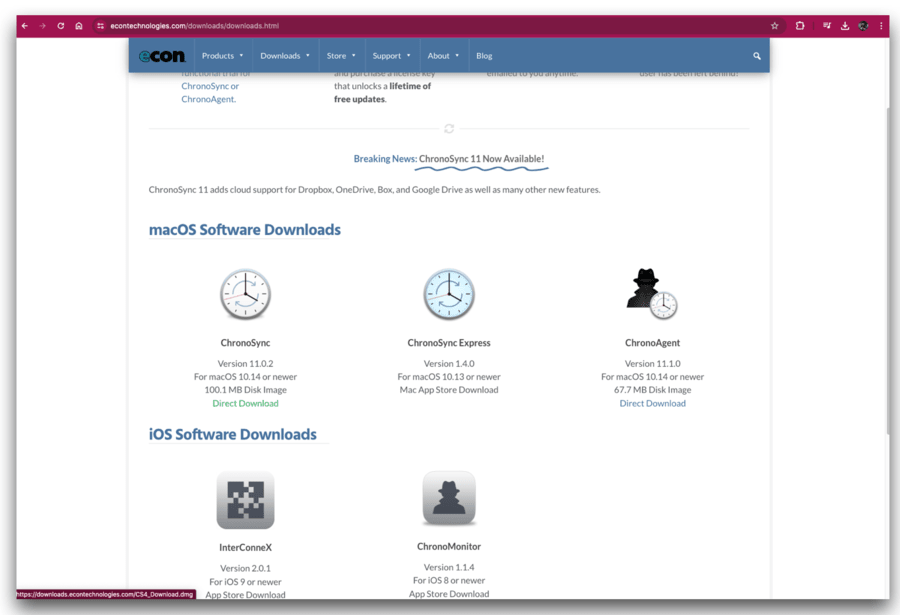
1. Download ChronoSync:
- Visit the Econ Technologies website and navigate to the Downloads section.
- Download the ChronoSync installer for macOS (Version 11.0.2 or newer).
2. Open the Installer:
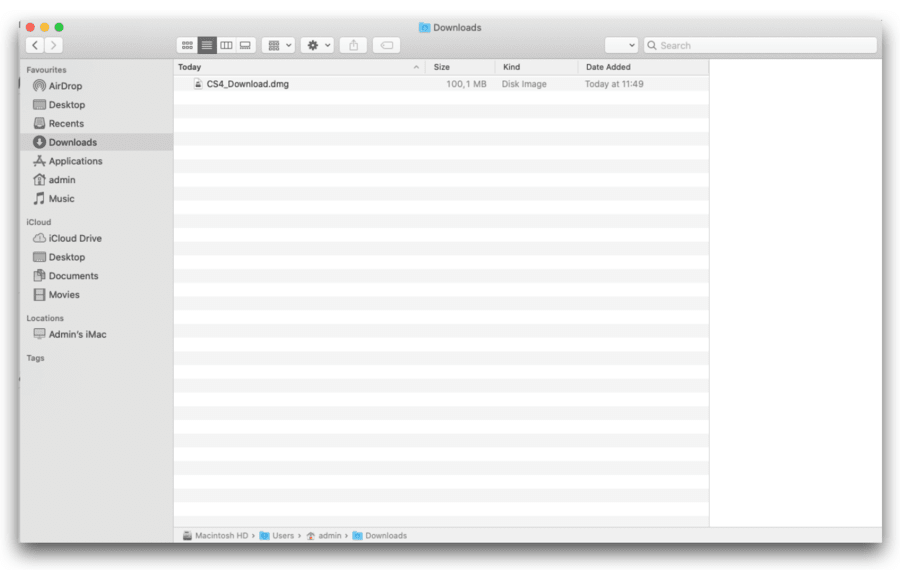
- Locate the downloaded .dmg file in your Downloads folder and double-click to open it.
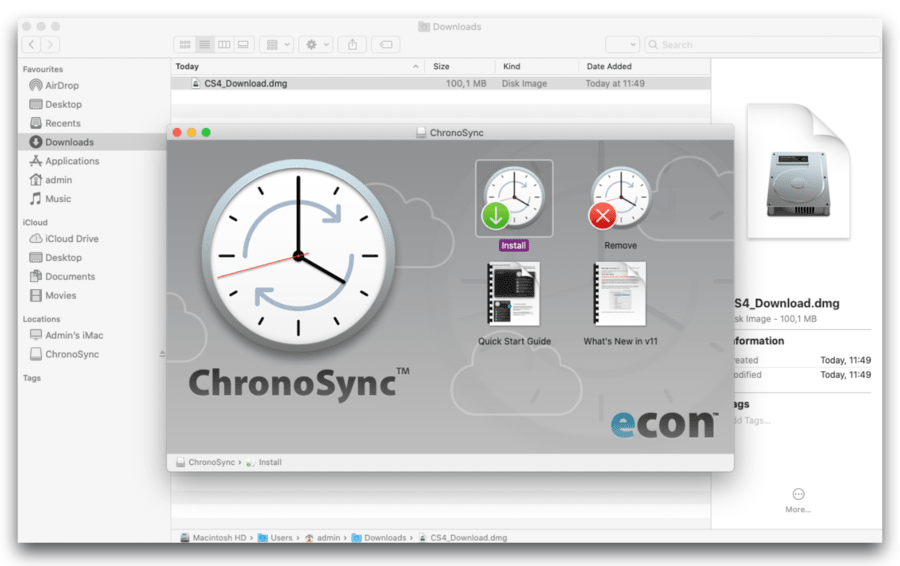
- The ChronoSync installer window will appear.
3. Start Installation:
- Double-click the ChronoSync icon to begin the installation process.
4. Follow the Installation Steps:
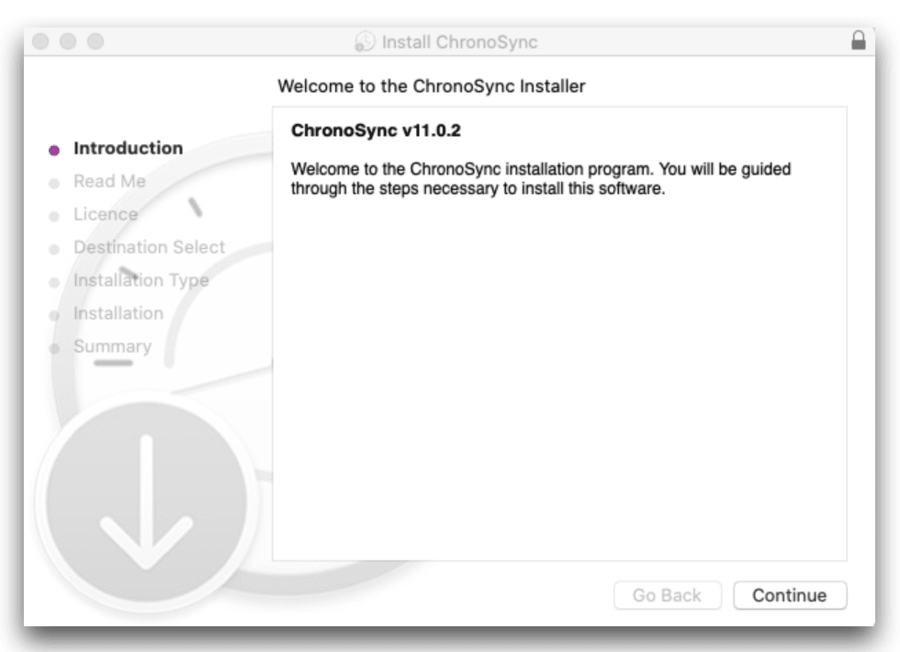
- The ChronoSync installer will guide you through the installation process. Click "Continue" on the introduction screen.
- Read through the software license agreement and click "Agree" to accept the terms.
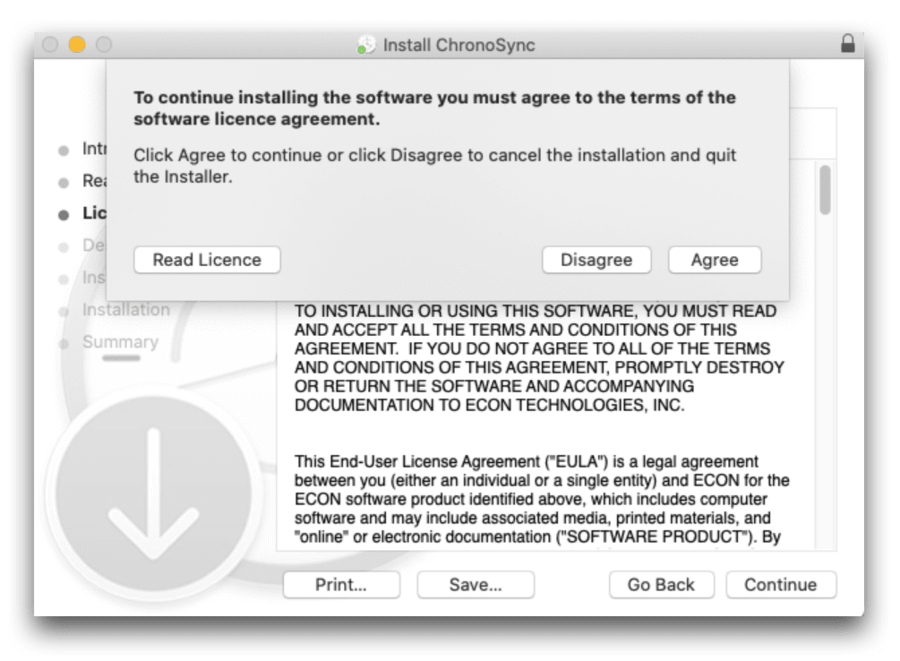
- Click "Install."

- Enter your admin username and password to authorize the installation.
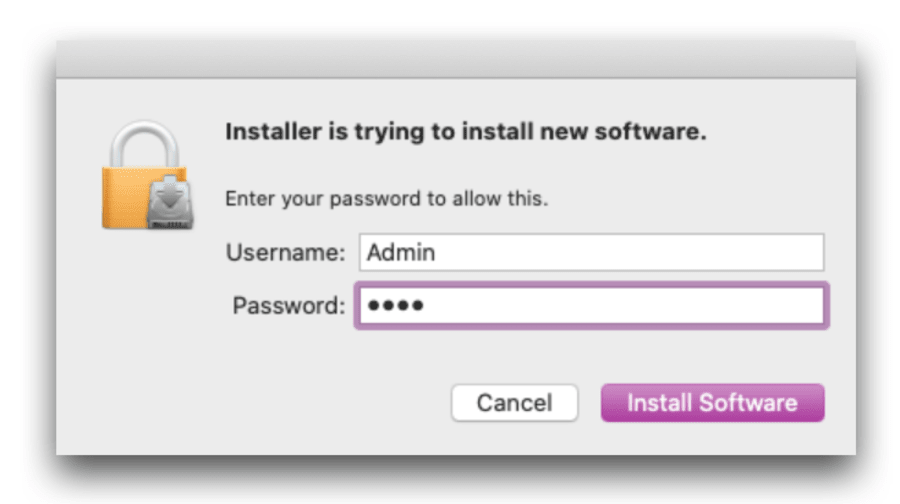
- The installer will run the necessary scripts, etc. to complete the installation. Wait for the process to finish.
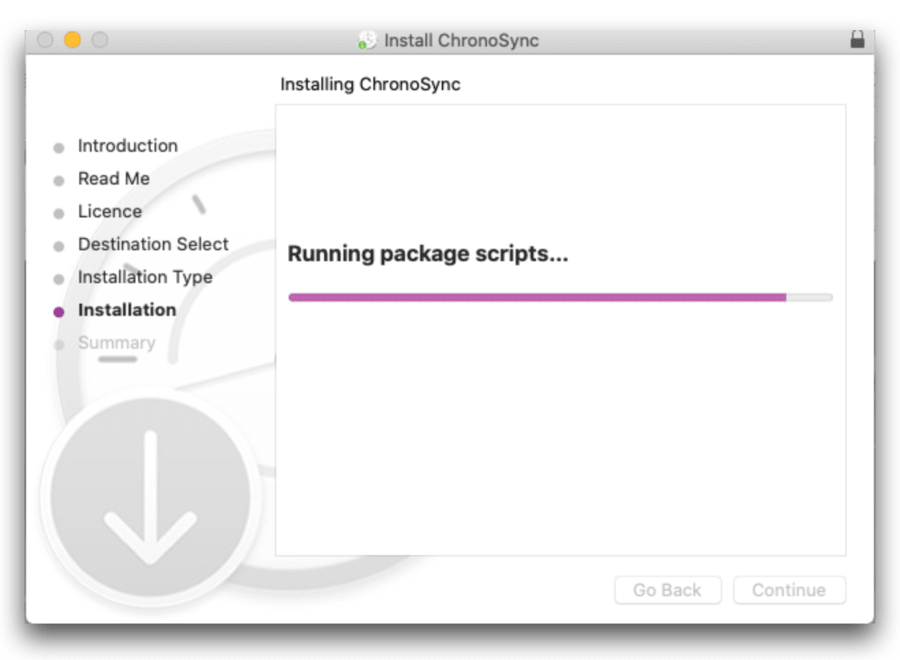
5. Allow Notifications:
- After installation, allow notifications to stay informed about sync activities.
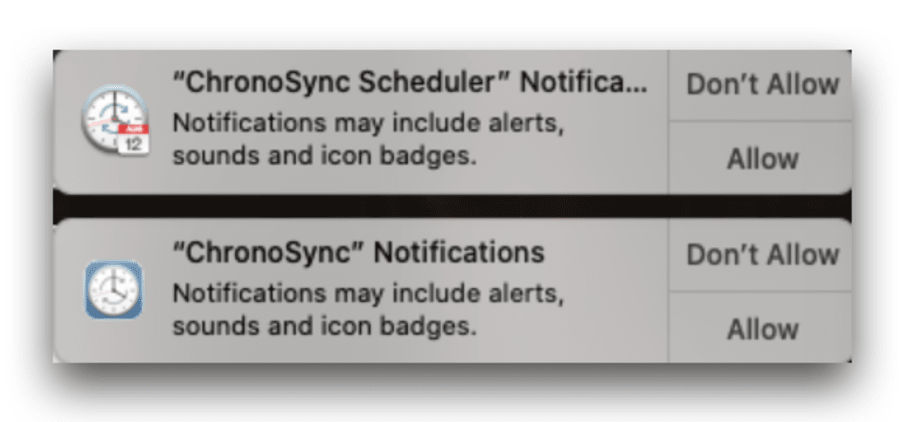
6. Finish Installation:
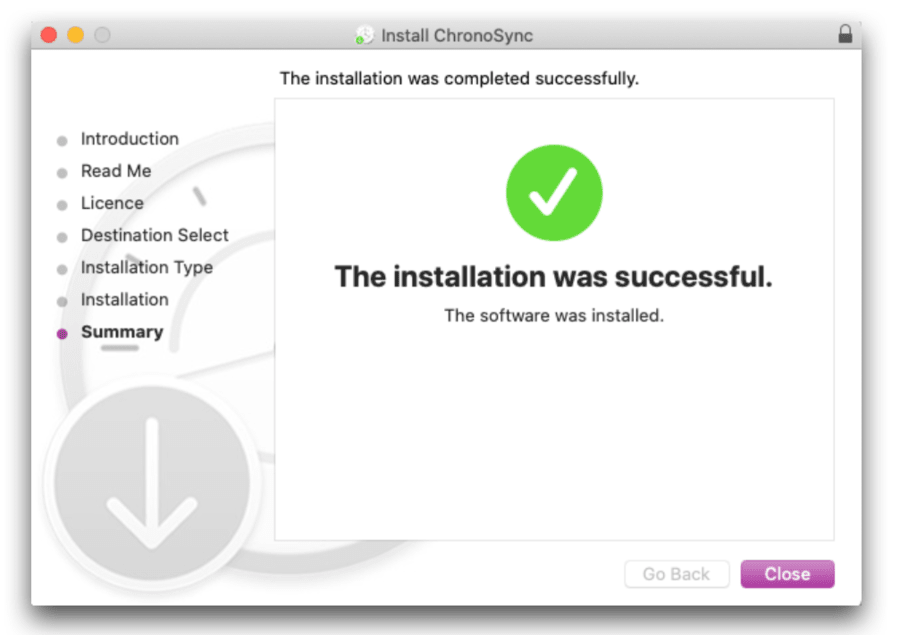
- Once the installation is complete, you will see a confirmation message. Click "Close" to exit the installer.
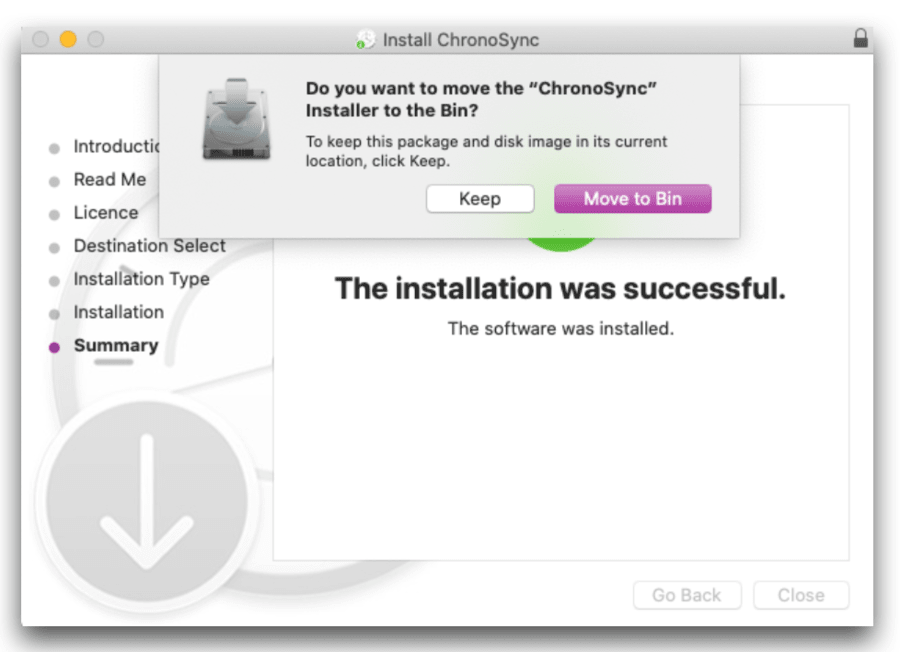
- After a successful installation, you may be prompted to move the ChronoSync installer to the bin. Choose "Move to Bin" to clean up your Downloads folder.
Chronosync initial launch and setup
7. Launch ChronoSync:
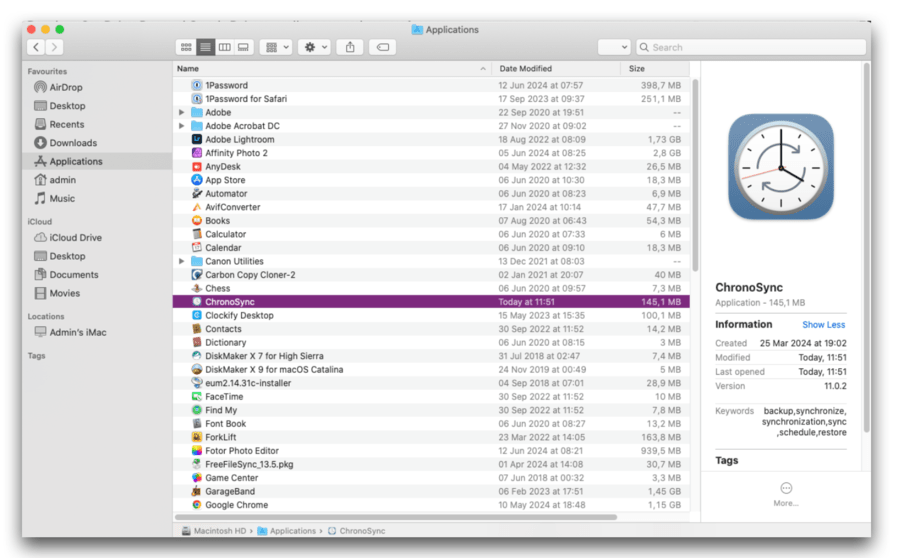
- Chronosync will automatically install into your Applications folder. Locate the ChronoSync application in your Applications folder and launch it.
8. Grant Full Disk Access:
- ChronoSync requires full disk access to function properly. When prompted, open the Security & Privacy settings in System Preferences.
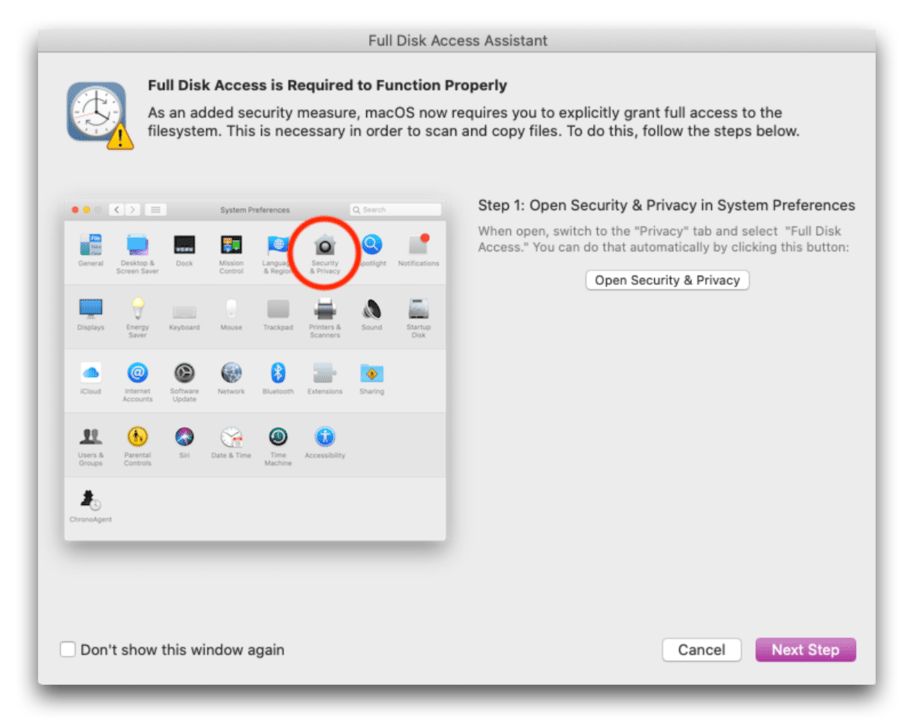
- Click the lock icon to make changes, then enable Full Disk Access for ChronoSync.
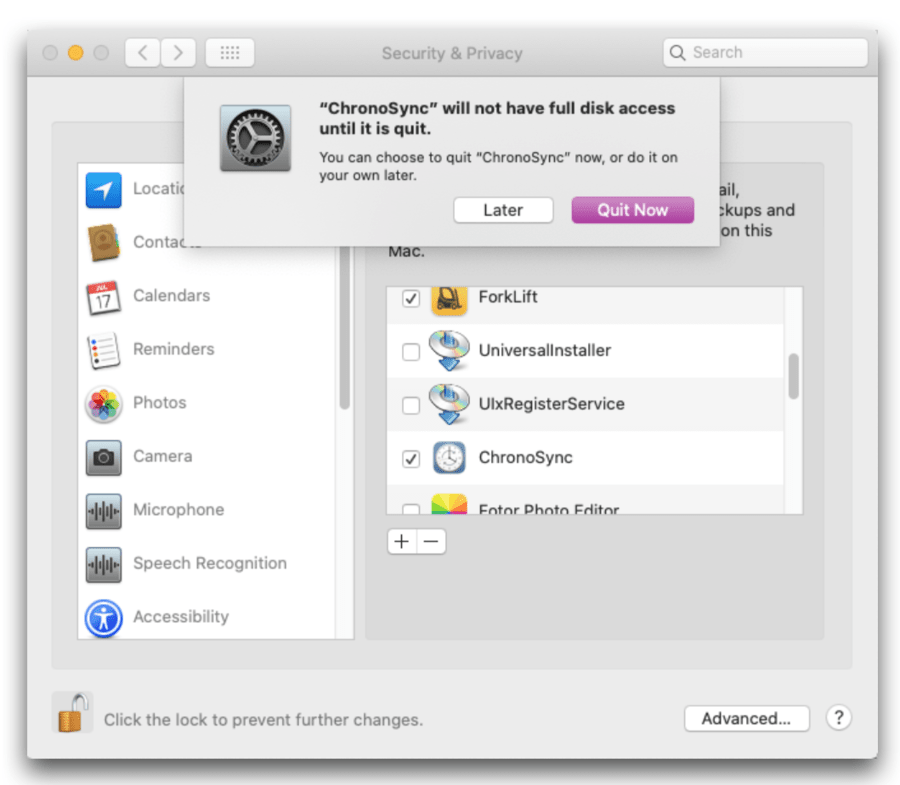
- You will need to quit and restart ChronoSync for the changes to take effect.
9. Activate ChronoSync:
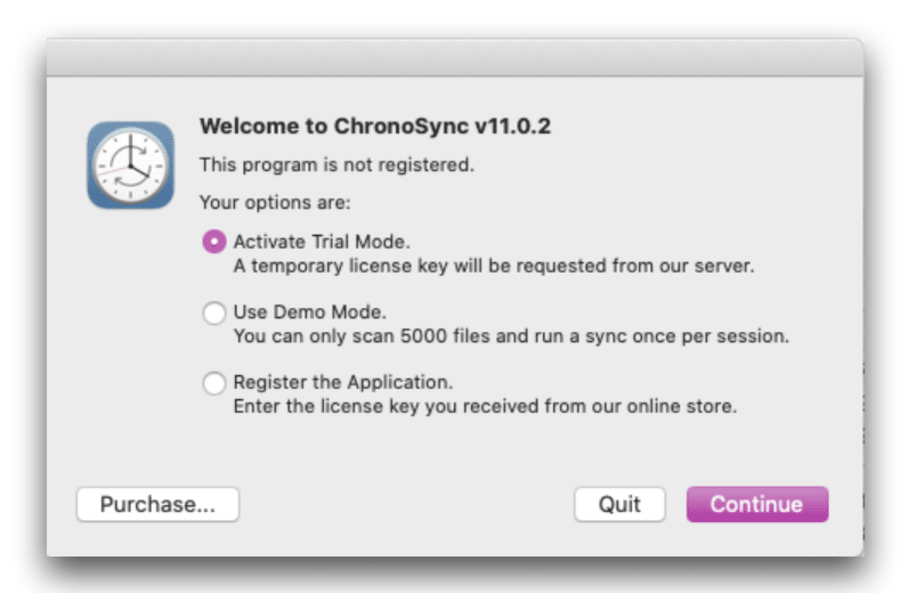
- On first launch, you will be prompted to activate ChronoSync. Choose "Activate Trial Mode" to use a temporary license, or register with a purchased license key.
10. Explore ChronoSync Organizer:
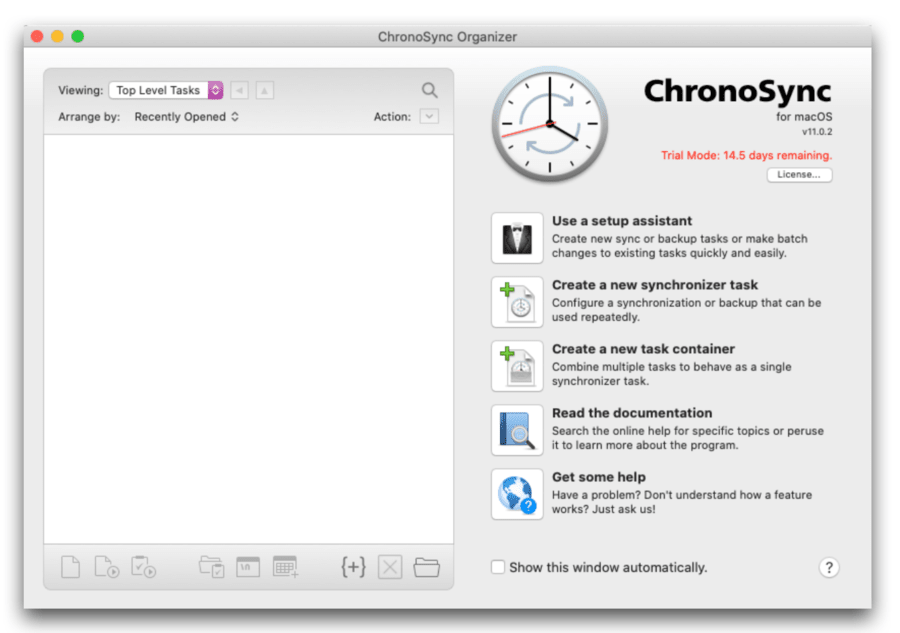
- After activation, you will see the ChronoSync Organizer. This is the main interface where you can create and manage sync tasks.
- This is the first window you’ll see whenever Chronosync launches.
Creating a new synchronizer task
11. Create a New Synchronizer Task:
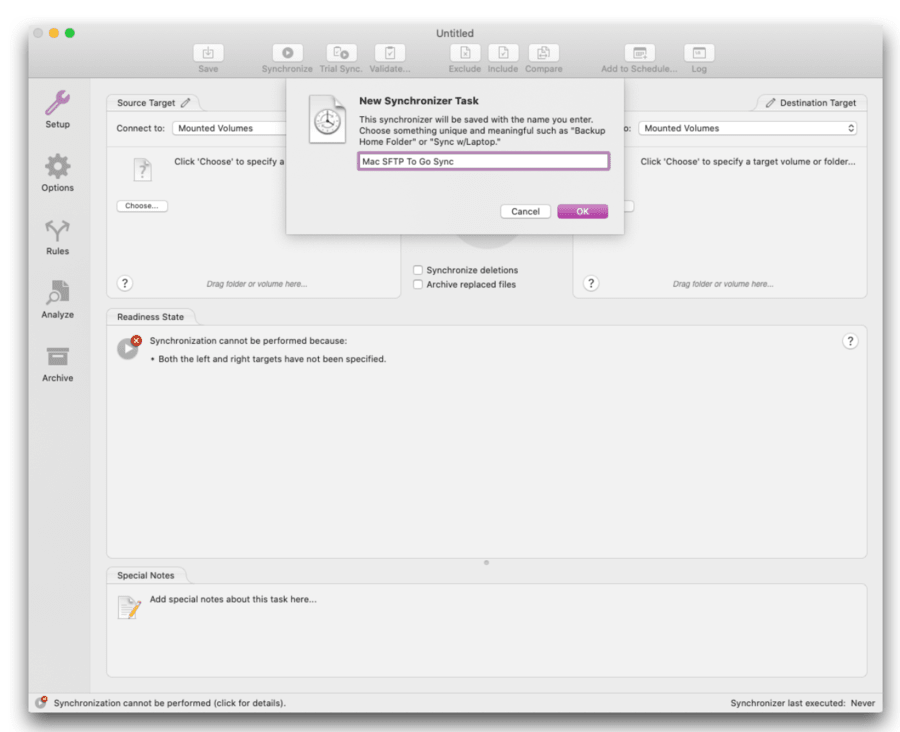
- In the ChronoSync Organizer, click "Create a new synchronizer task."
- Name your task something meaningful, like "Mac SFTP To Go Sync."
Setting up your local “source” and remote “destination folders
12. Connect the SFTP To Go server and choose your “destination” folder:
- In the task setup screen, you’ll see right and left panes where you can connect to, mount, or specify the source and destination targets for synchronization.
- We started by choosing the “destination” on the right, which will be our SFTP To Go Server’s home folder.
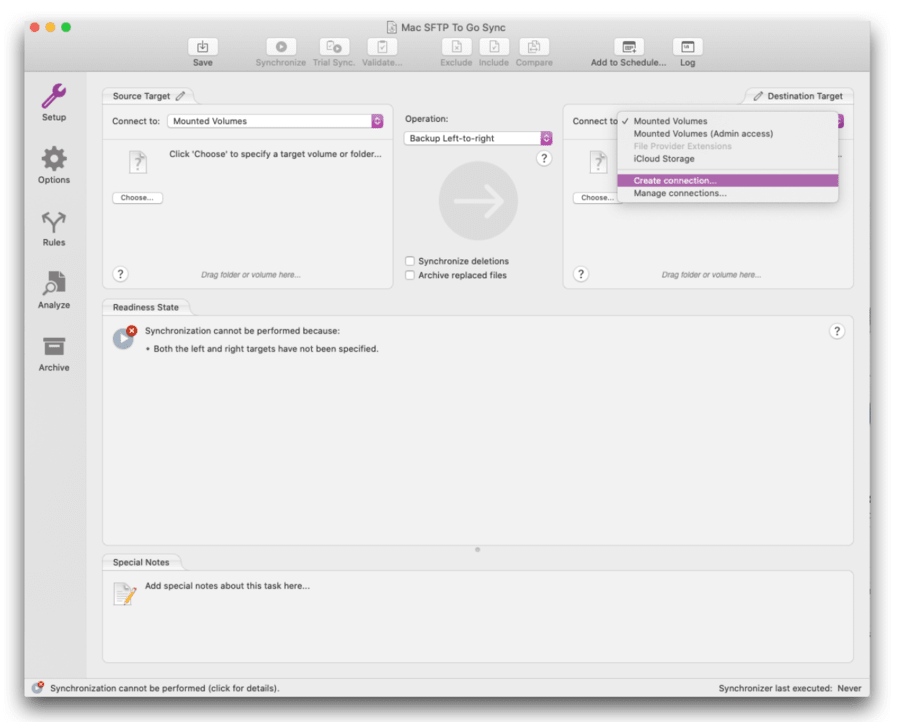
- For the destination, click "Connect to" and choose "Create connection."
- Name your connection.
- Ensure that the Connection Type is “SFTP File Server”,
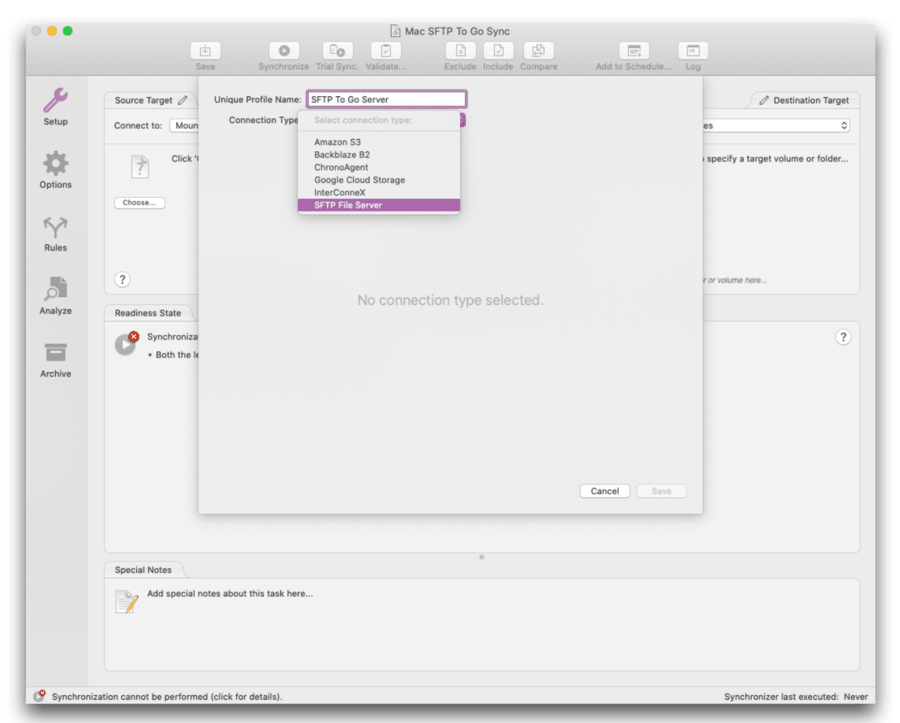
- Enter your SFTP To Go server details. In the "Hostname or Address" field, enter the host details obtained from your SFTP To Go dashboard>Credentials tab.
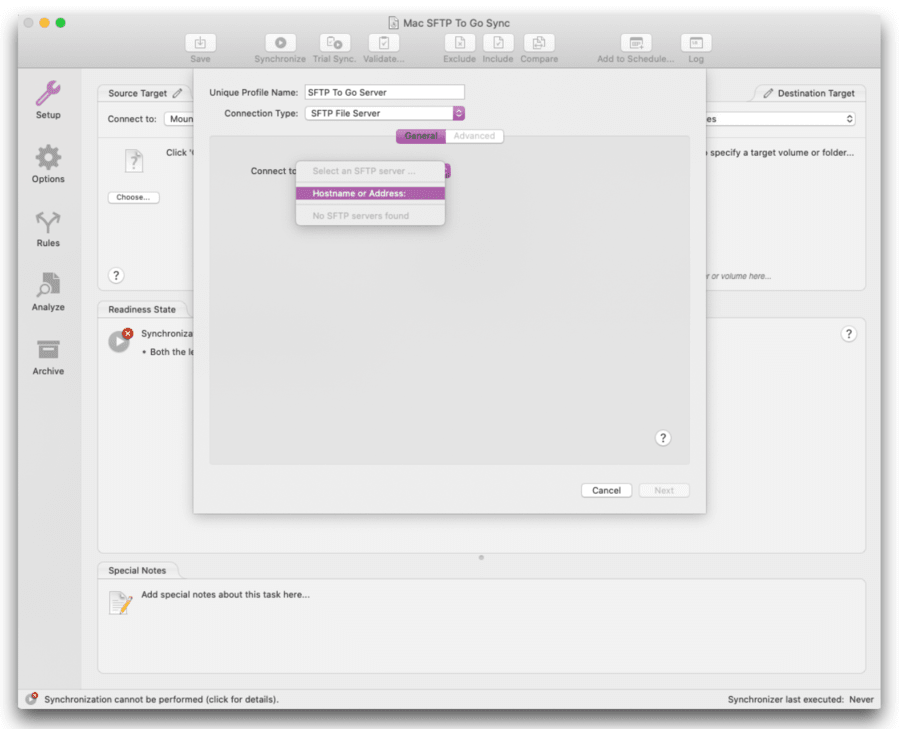
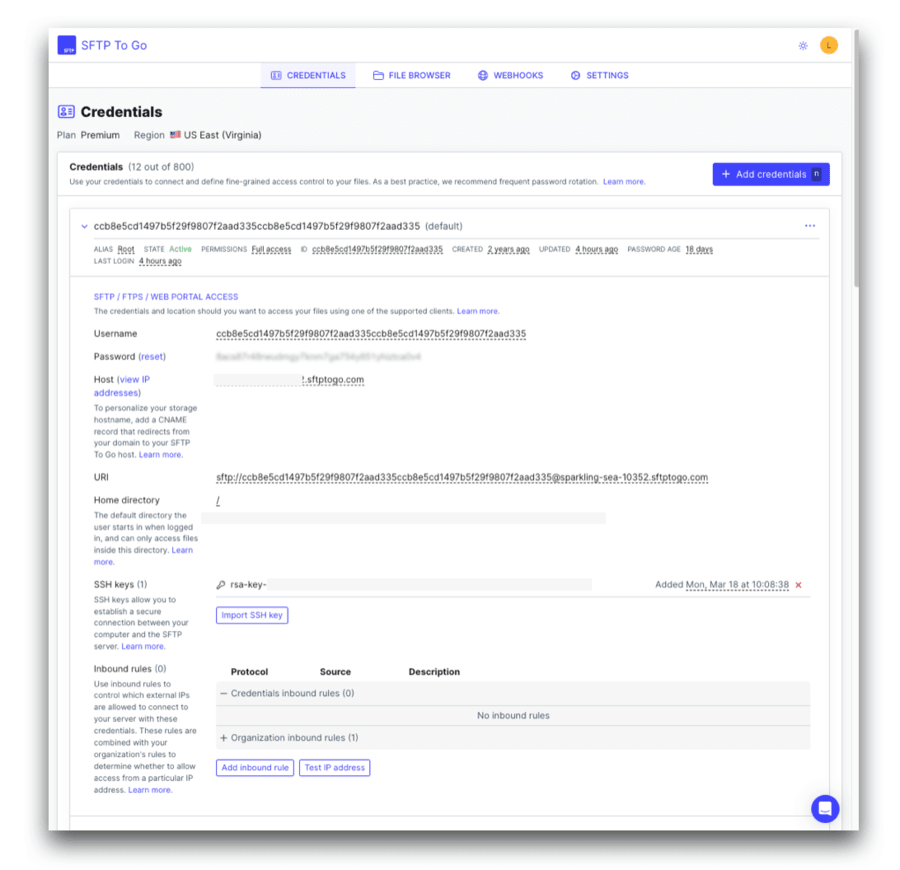
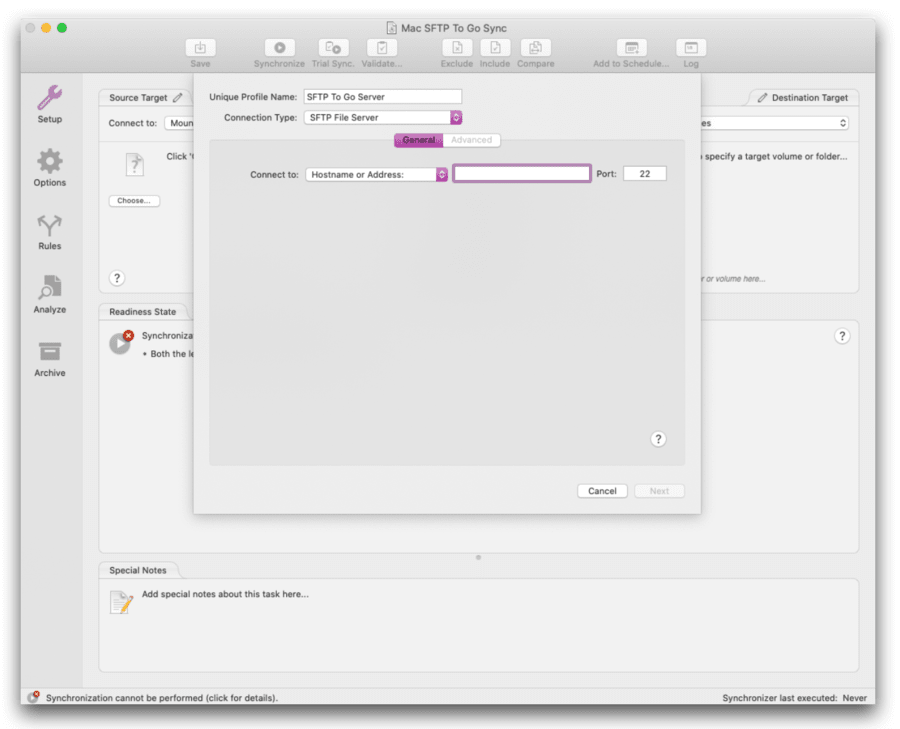
- Fill in the "User Name" and "Password" fields with your credentials, and click "Test" to confirm the settings are valid.
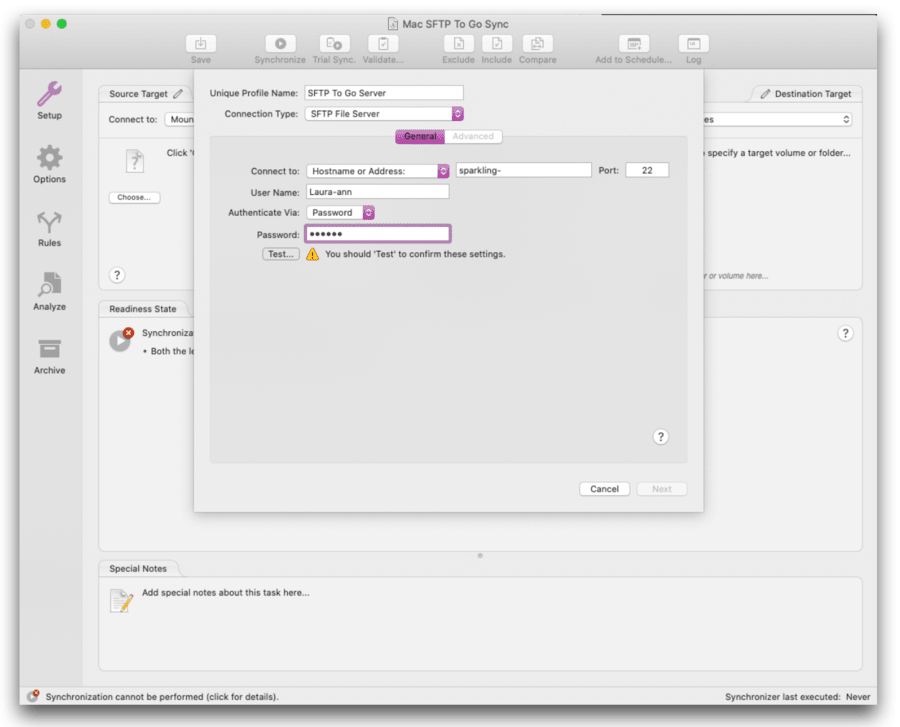
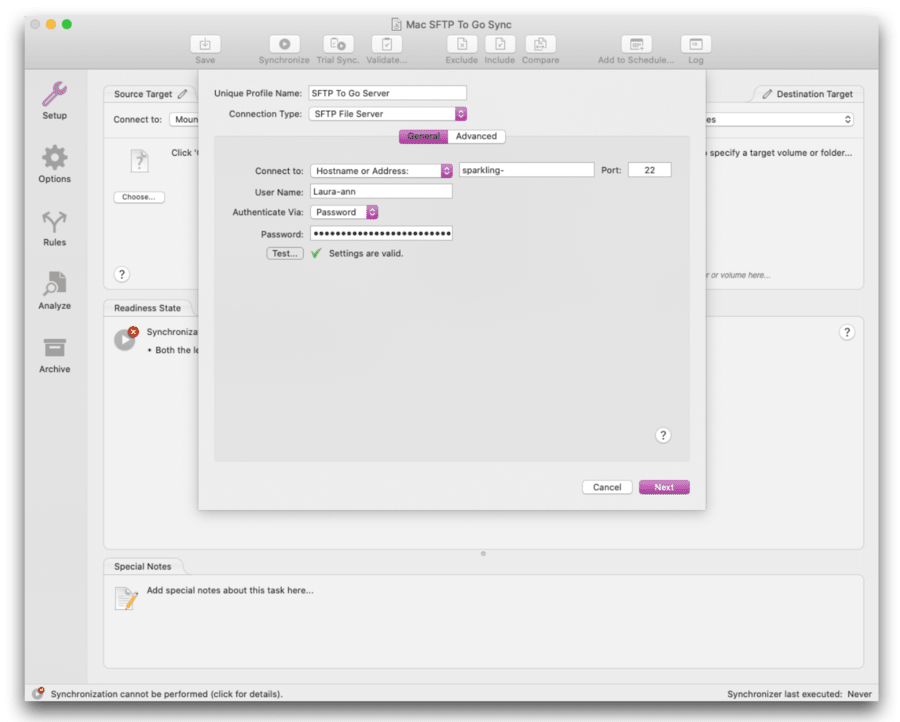
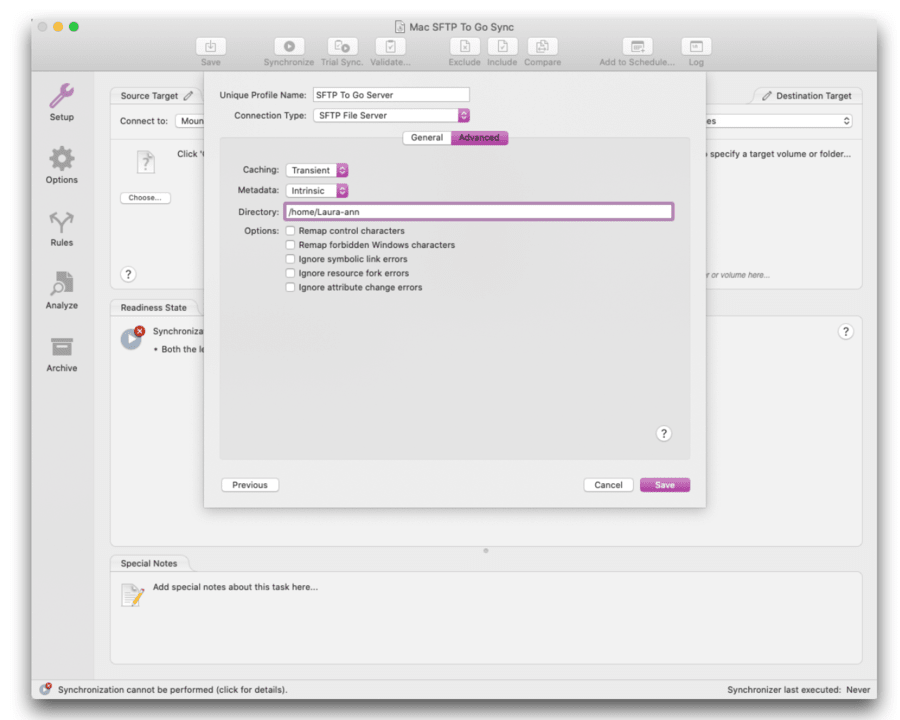
- Go to the "Advanced" tab to configure additional settings such as caching and metadata options. Set the directory to the desired remote folder.
13. Choose the local “source” folder you want to sync:
- For the source, on the left-hand side, select the local folder you want to sync by clicking “Choose” and navigating to the appropriate folder.
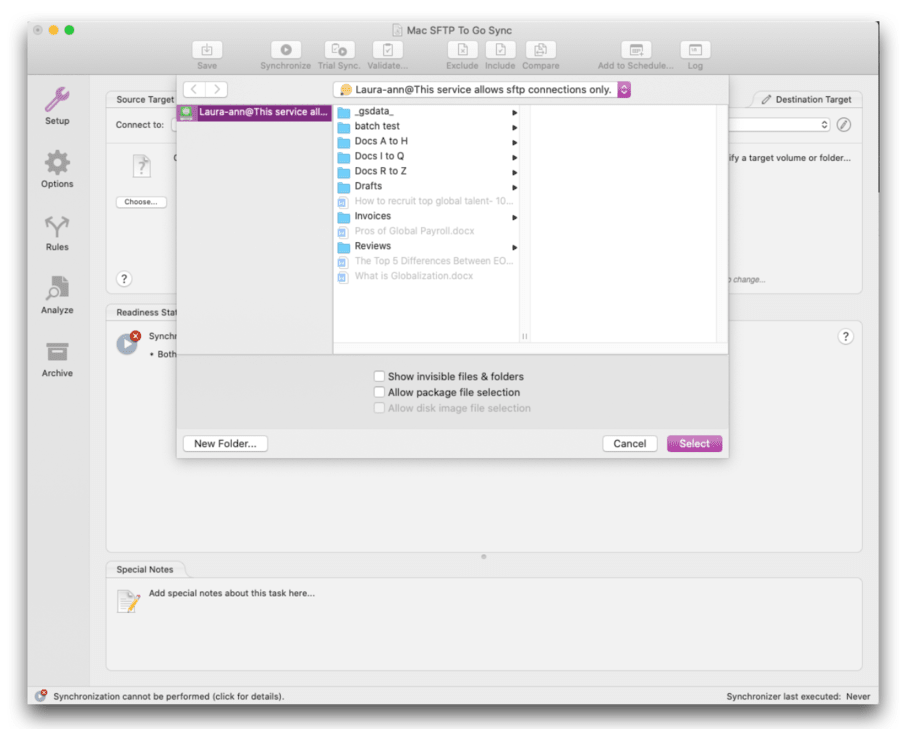
- Click “Select”.
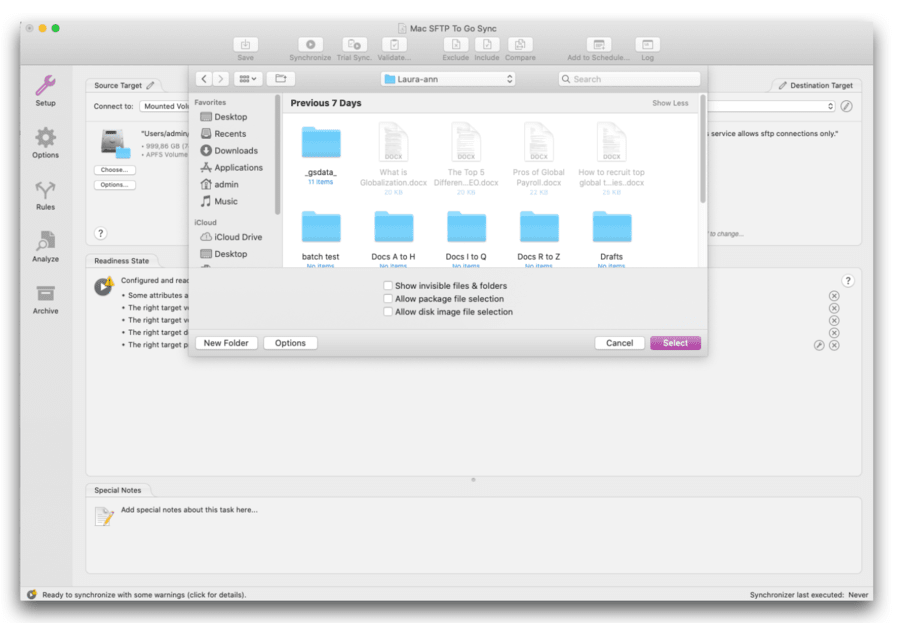
Configure and run your SFTP Mac sync
14. Final Mac to SFTP sync setup:
- Ensure both source and destination paths are correctly set. The software will indicate if there are any issues with the setup. It’s all looking good, and the Readiness State confirms that we are now connected to SFTP To Go and ready to synchronize.
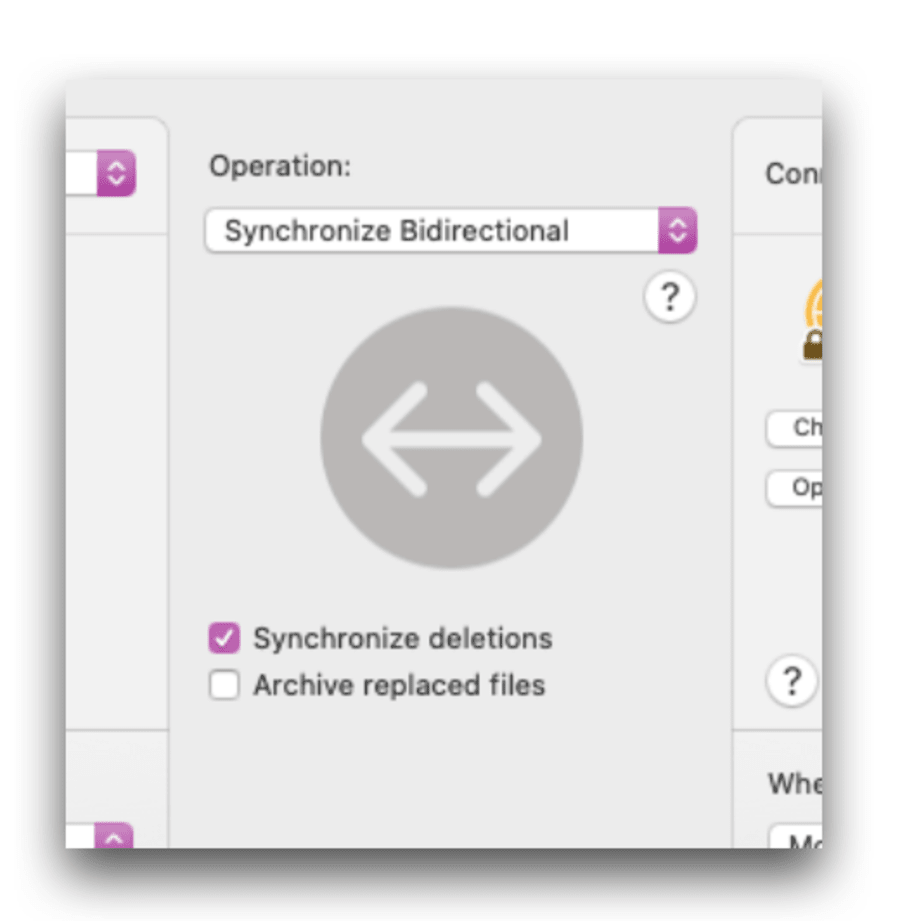
- You may wish to select “Synchronize deletions” and/or “Archive replaced files” as well. You’ll find these options under the operation parameters in the center columns.
- In the "Options" tab, you can set additional sync options such as file exclusions and conflict handling. In the “File handling” section, you should choose the “Custom” option with “Dissect” packages selected, as this is a preferred setting for synching with SFTP To Go.
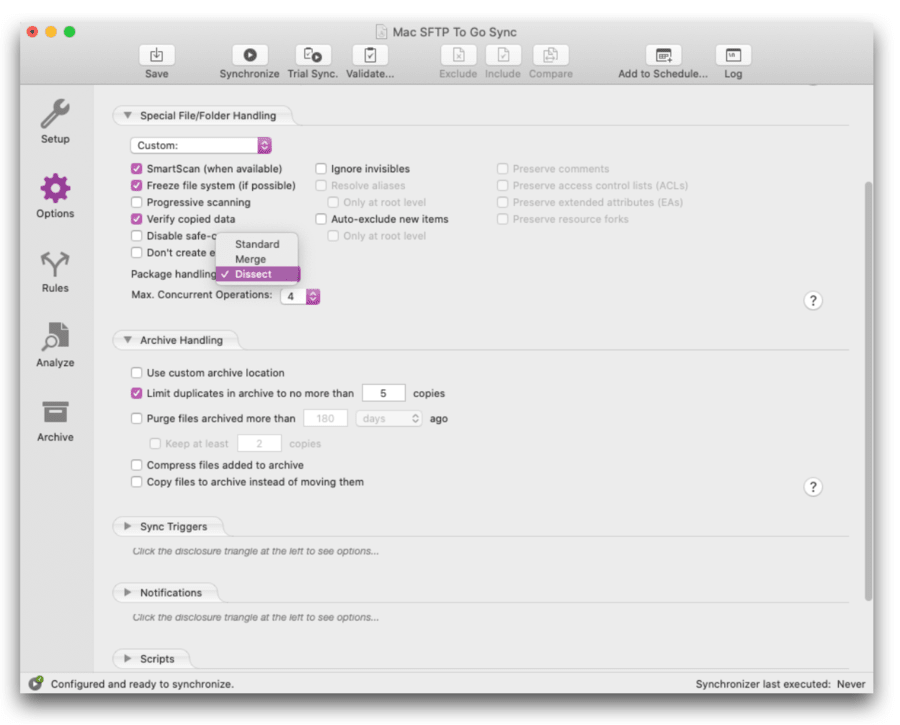
- Once everything is set up and validated, the synchronization status will show as ready.
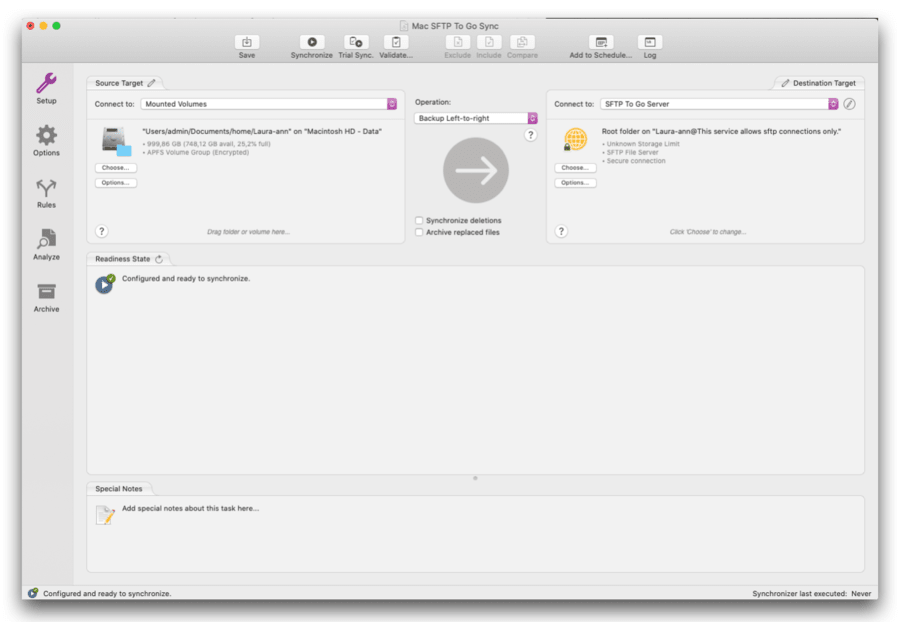
15. Initiate synchronization:
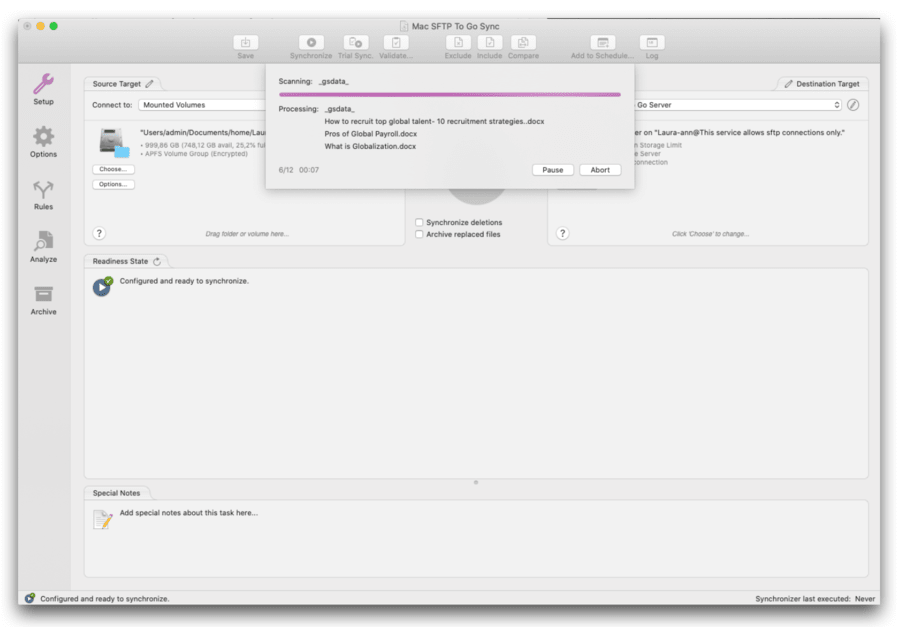
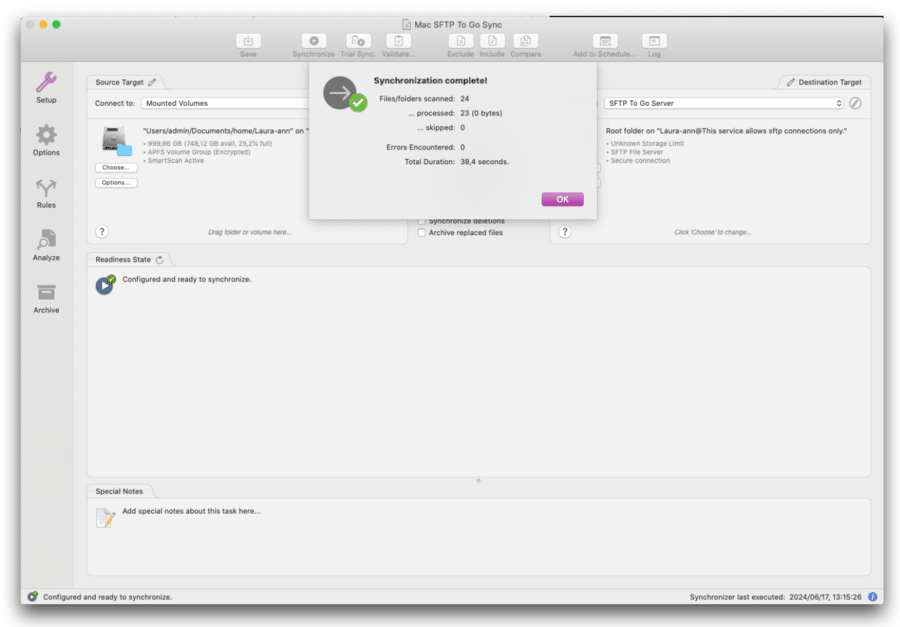
- Click "Synchronize" to start the process. The software will display the progress and any warnings or errors encountered.
- During the synchronization, you can monitor the progress and details of the files being synced.
Triggered and scheduled syncs between MacOS and SFTP
16. Schedule sync tasks:
- You can schedule tasks to run at specific times. In the ChronoSync Task window, click "Add to Schedule" near the top right.
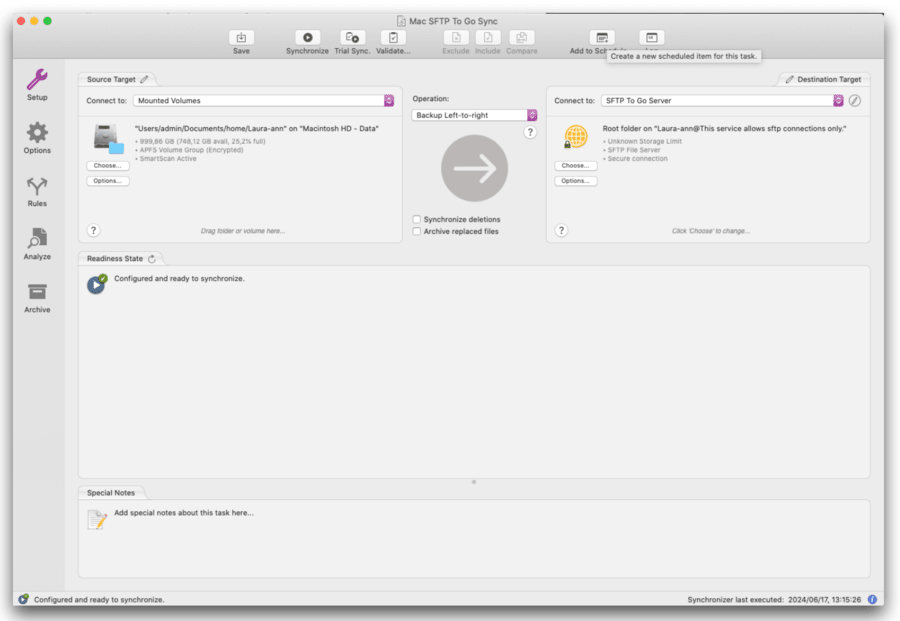
- Configure the schedule settings, choosing from options like hourly, daily, weekly, or monthly under the “Simple interval” option.
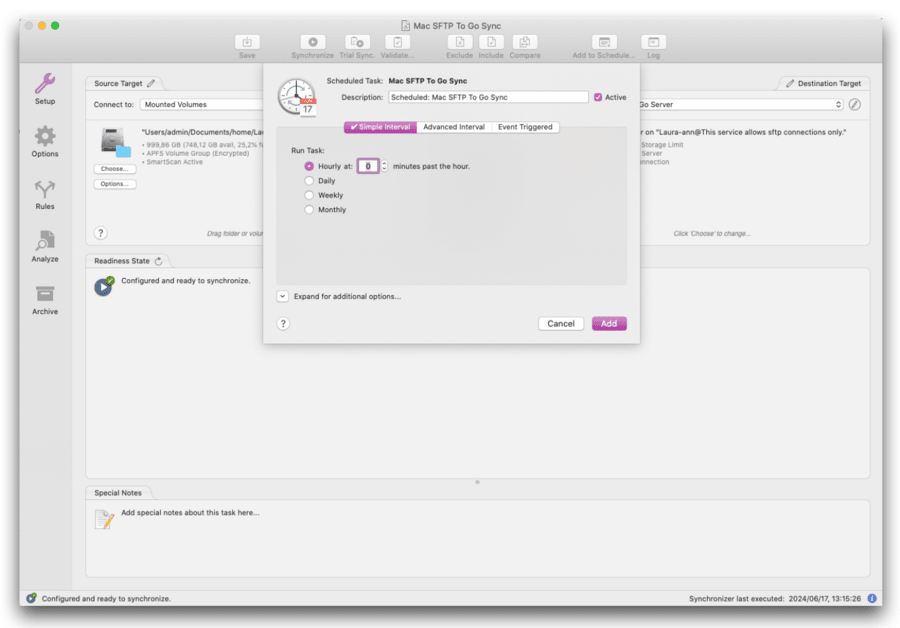
- You can also set advanced intervals or event-triggered tasks if needed. We opted for event-triggered sync.
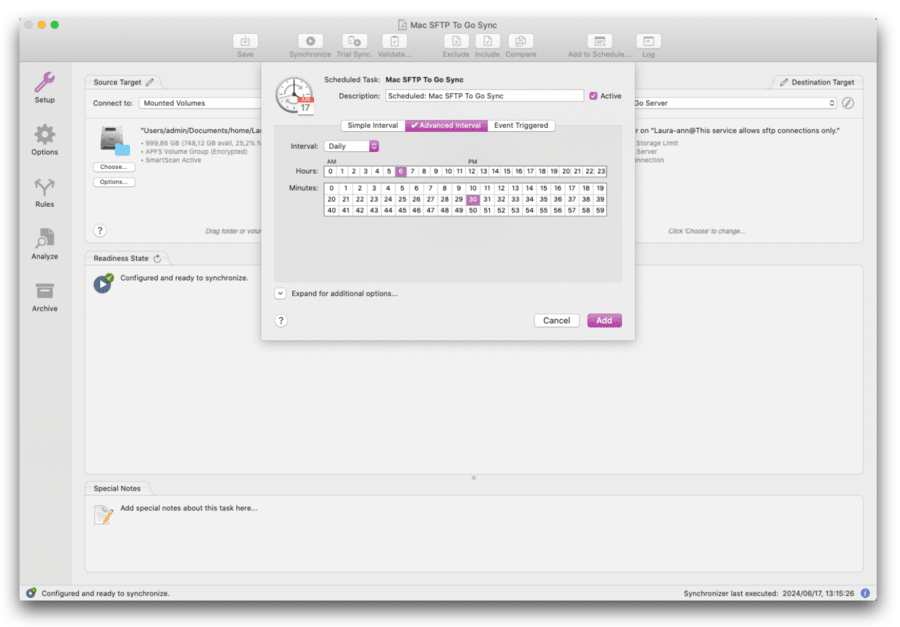
17. Advanced interval scheduling:
- Use the "Advanced Interval" tab to set specific times for the task to run.
- This allows for detailed scheduling down to the exact minute.
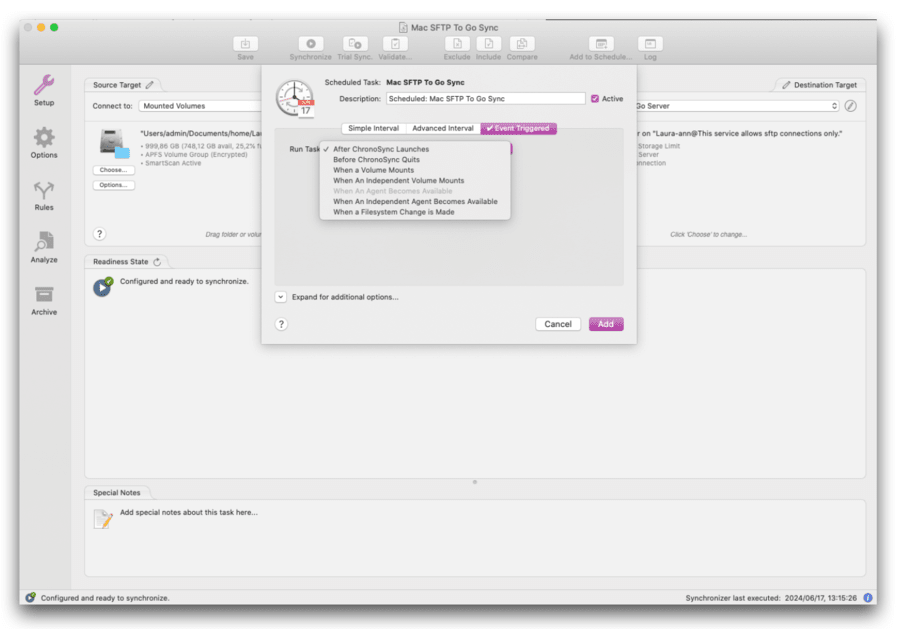
18. Event-triggered sync scheduling:
- You can also set tasks to run based on specific events, such as when a volume mounts or when the system wakes from sleep.
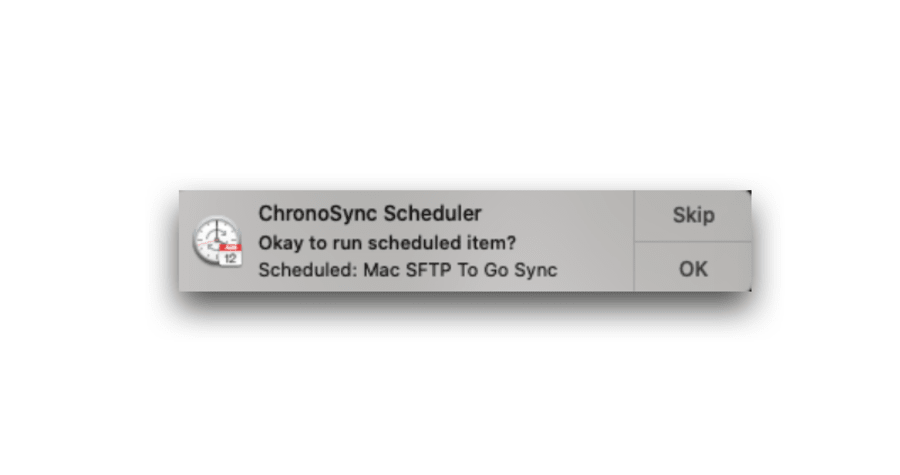
- This ensures your tasks run automatically based on system events or user actions. We chose to be prompted before scheduled syncs, just to test Chronosync.
- Click “Add” to finalize your settings.

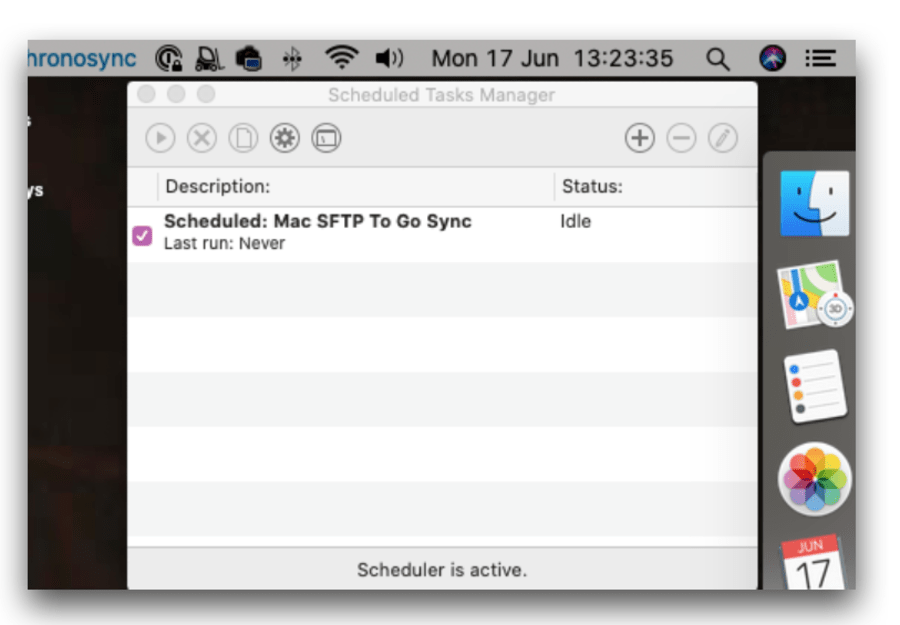
19. Monitor scheduled tasks:
- Use the Scheduled Tasks Manager to view and manage all your scheduled tasks, accessible by CTRL-clicking the app icon.
- This interface provides an overview of the status and next run time for each task.
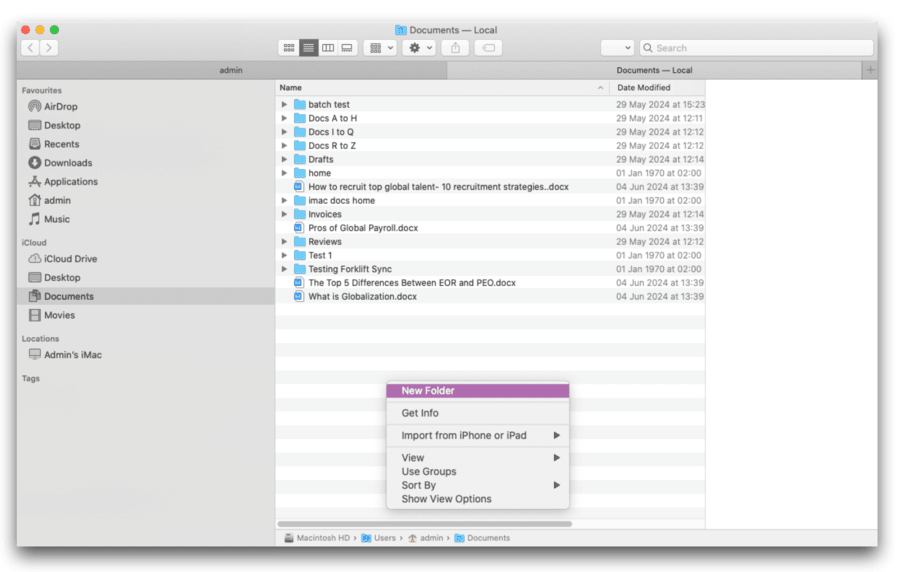
- We tested the triggered sync by creating a new folder at our source.
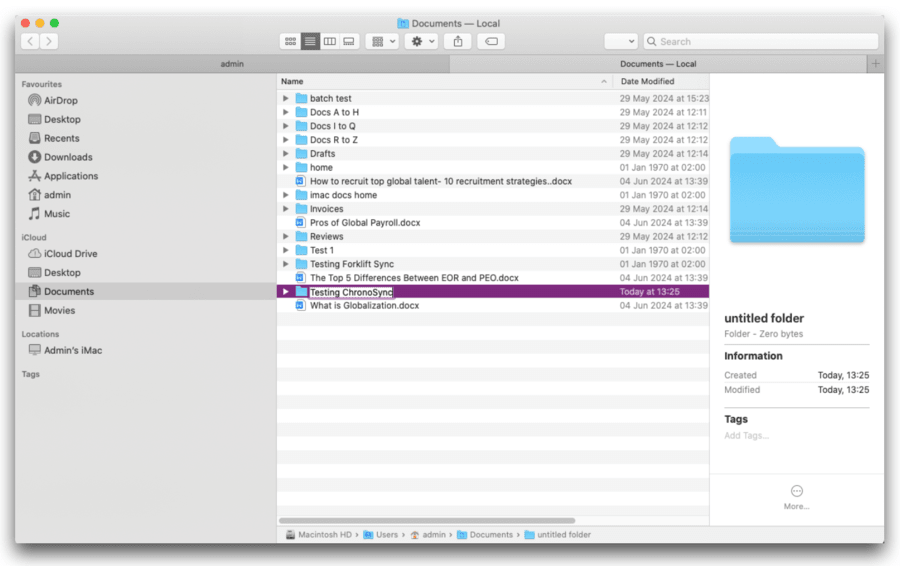
- Shortly afterward, the prompt appeared, confirming that the feature works as intended. You don’t need to enable prompts, of course.
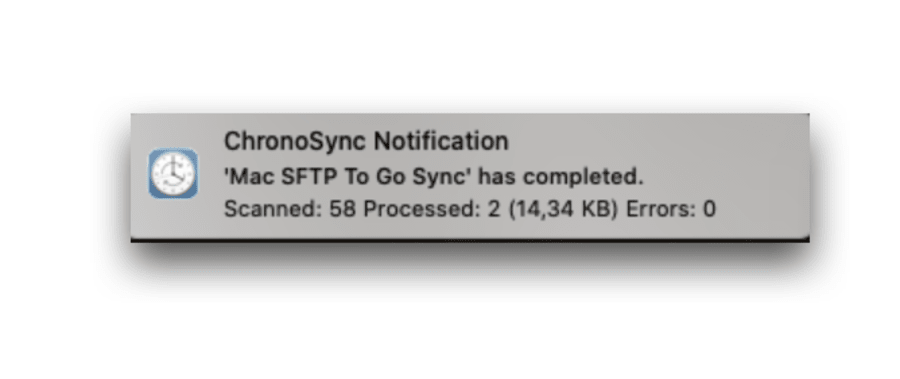
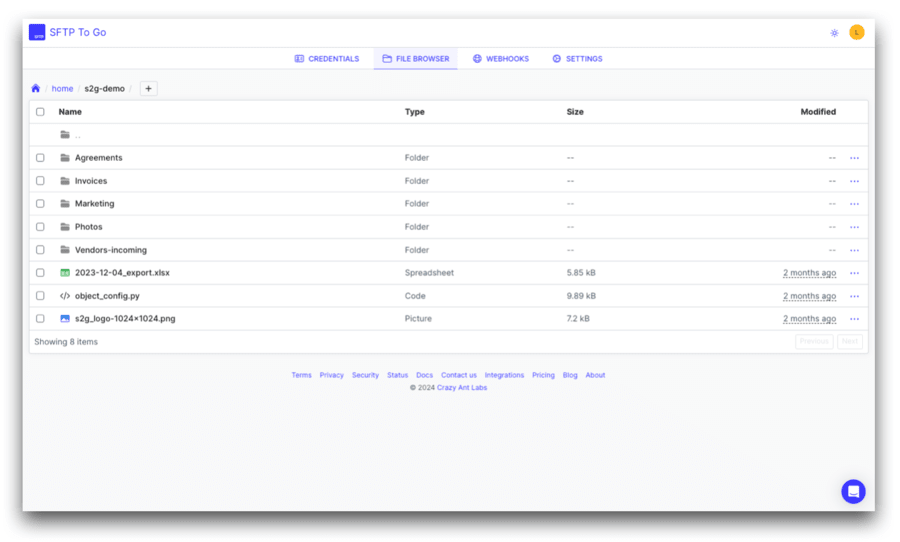
- Voila…success.
Other options, configurations, and advanced Chronosync settings
20. Change your sync type:
- Chrono sync has way more options than the other sync solutions we’ve tried. There are a whopping fifteen sync types to choose from, not to mention all the other granular config options.
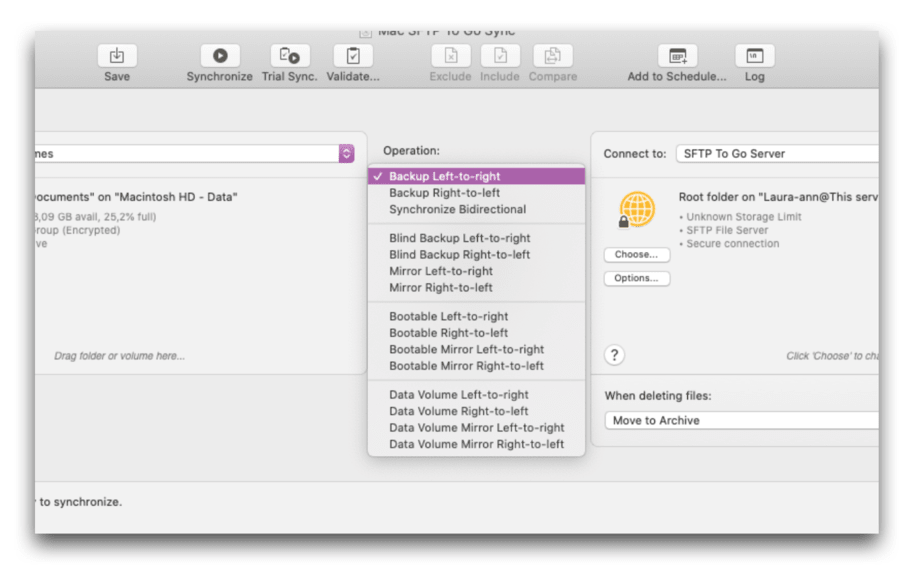
- Bidirectional sync with “Synchronize deletions” is a great option, and you have the added option of archiving deletions—and plenty more.
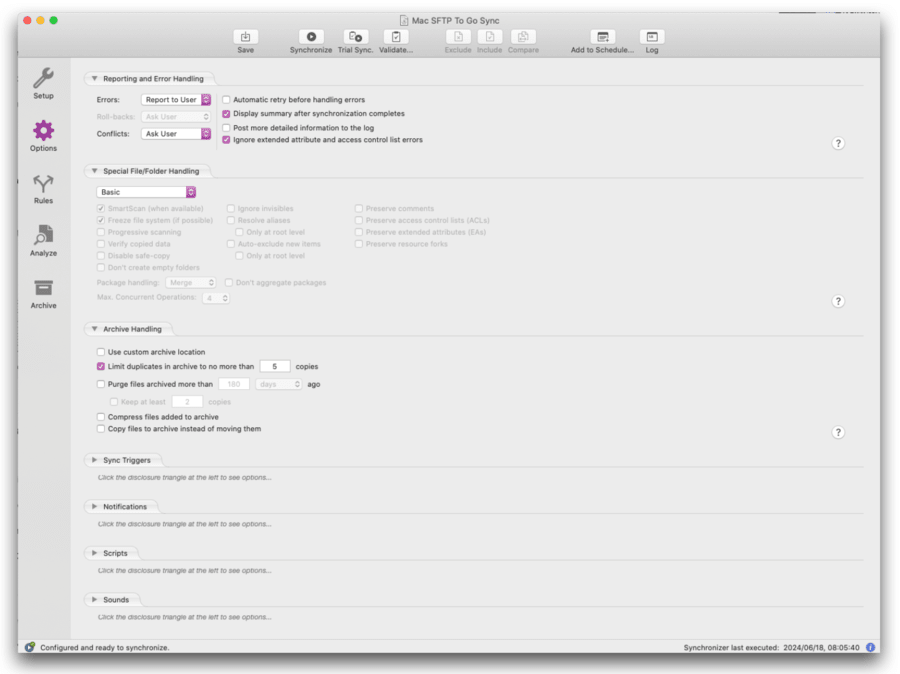
21. Configure options:
- Configure error handling, archive handling, sync triggers, notifications, sounds, scripts, and other preferences in the “Options” tab.
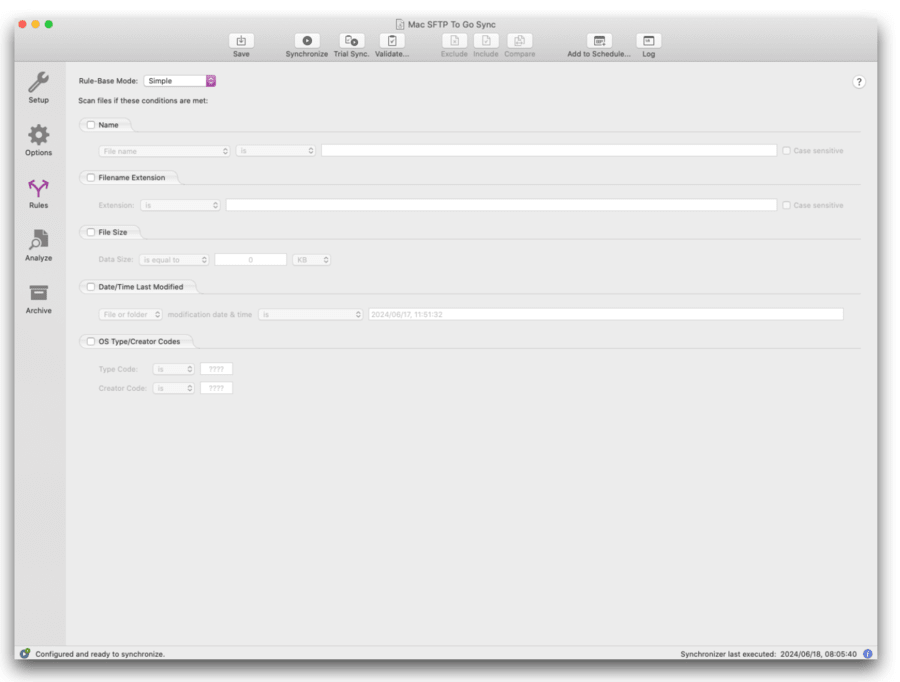
22. Set rules:
- Set “Rules” to specify update parameters around a range of specific file features.
23. Analyze, select and specify sync operations:
- CTRL click selections in the “Analyze” field to explore a range of options for selection-specific sync-and-restore actions. We’re quite impressed by the granularity of ChronoSync’s file and sync management options.

In conclusion: our Chronosync review
ChronoSync is a highly recommended solution for syncing your local Mac folders with an SFTP To Go server.
It offers a massive range of customizable cloud service, SFTP, and FTP sync options for Mac, including bidirectional, backup, and mirror syncs, along with advanced scheduling and automation features, archiving and restore features. Its user-friendly interface and error handling make it suitable for both novice and advanced users.
Whether you need regular backups, real-time SFTP sync, or detailed file handling, ChronoSync offers all you’ll need for efficient and secure data management in conjunction with SFTP To Go. For more detailed instructions and to explore other features, check out the ChronoSync User Manual available on the Econ Technologies website.
Explore SFTP automation to reduce human error and streamline workflows.
Frequently Asked Questions
How do I sync files from my Mac to an FTP or SFTP server?
To sync files from your Mac to an FTP or SFTP server, you can use tools like ChronoSync or GoodSync along with SFTP To Go. Set up a sync task by selecting your local Mac folder as the source and your FTP or SFTP server as the destination. This setup ensures your files stay synchronized between your Mac and the server.
What is the best software for FTP sync on Mac?
ChronoSync and Transmit 5 are excellent choices for FTP sync on Mac. Both can be paired with SFTP To Go to enhance security and efficiency, making them ideal for managing both FTP and SFTP syncs.
Can ChronoSync automate FTP sync tasks?
Yes, ChronoSync can automate FTP sync tasks with advanced scheduling options. By using SFTP To Go, you can set up your syncs to run automatically at specific intervals, ensuring continuous synchronization without manual intervention.
Does Mountain Duck support FTP sync?
Yes, Mountain Duck supports FTP sync by allowing you to mount FTP servers as local drives on your Mac. Combined with SFTP To Go, it provides a seamless FTP sync experience with enhanced security features, ensuring your files are synchronized efficiently.
How secure is FTP sync with ChronoSync?
ChronoSync offers secure FTP sync by supporting encrypted connections. When used with SFTP To Go, it ensures that your data is protected during transfer, making it a reliable option for secure file synchronization.

